Sometimes your workstation just isn’t enough. Sometimes you just have too much data. Or maybe you just want to have fun with GPUs.
Context
Whatever the reason is, if you are a Data Scientist, there will probably be a time in your life when you will want to increase your computational power. But in the cloud era, this should not be a problem, right ?
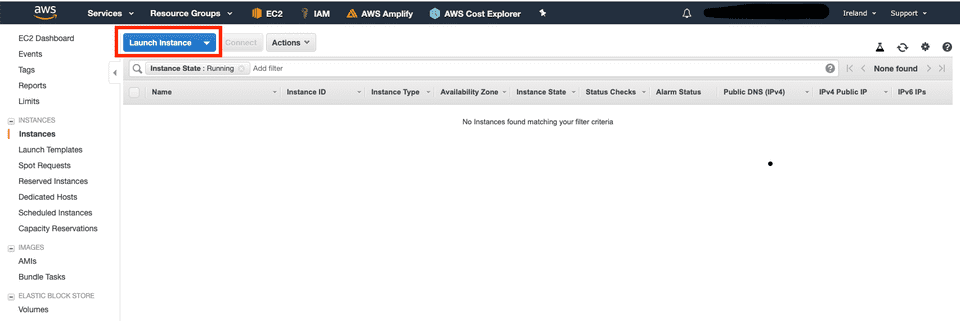
Well, that’s what I thought. And it’s true that using the well-known EC2 service from AWS, you can basically instanciate a virtual machine of whatever size within minutes. And if you chose it well, it can even come with all the packages that you need.
And then, you just need to follow a tutorial like the following to actually launch & access a jupyter notebook: Jupyter Notebooks on AWS EC2 in 12 (mostly easy) steps.
12 steps. That’s a LOT. Thanks to Medium, we can see that this tutorial is a 9 minutes read. Well, I think even 9 minutes is way too much. All the more so because we will need to do these steps every time we want to launch an instance.
What I want is to be able to launch an EC2 instance and then directly access a jupyter hosted on that instance without even having to SSH into it.
Luckily, I will share with you how you can do just that.
How ?
Short answer: Amazon Machine Images (AMIs).
What is it ? From AWS Documentation:
An Amazon Machine Image (AMI) provides the information required to launch an instance. You must specify an AMI when you launch an instance. You can launch multiple instances from a single AMI when you need multiple instances with the same configuration. You can use different AMIs to launch instances when you need instances with different configurations.
And from the AWS console:
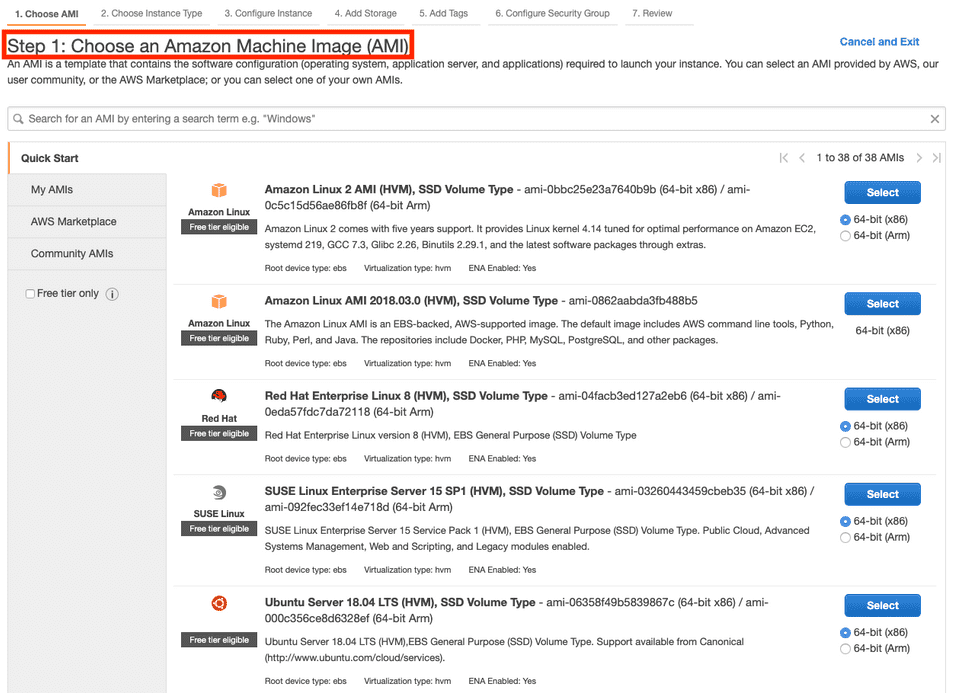
An AMI is a template that contains the software configuration (operating system, application server, and applications) required to launch your instance. You can select an AMI provided by AWS, our user community, or the AWS Marketplace; or you can select one of your own AMIs.
Basically, every time you launch an EC2, you need to specify an AMI:
You see that there is a bunch of AMIs that you can use: Ubuntu, Red Hat, Amzon Linux, etc.
Also if you scroll down a bit you might see some “Deep Learning” AMIs, which are basically Amazon Linux AMIs with many pre-installed machine learning tools and frameworks (anaconda, python, Keras, TensorFlow, PyTorch…)
But what’s truly amzing about AMIs is that you can create your own !
Why is it so cool ?
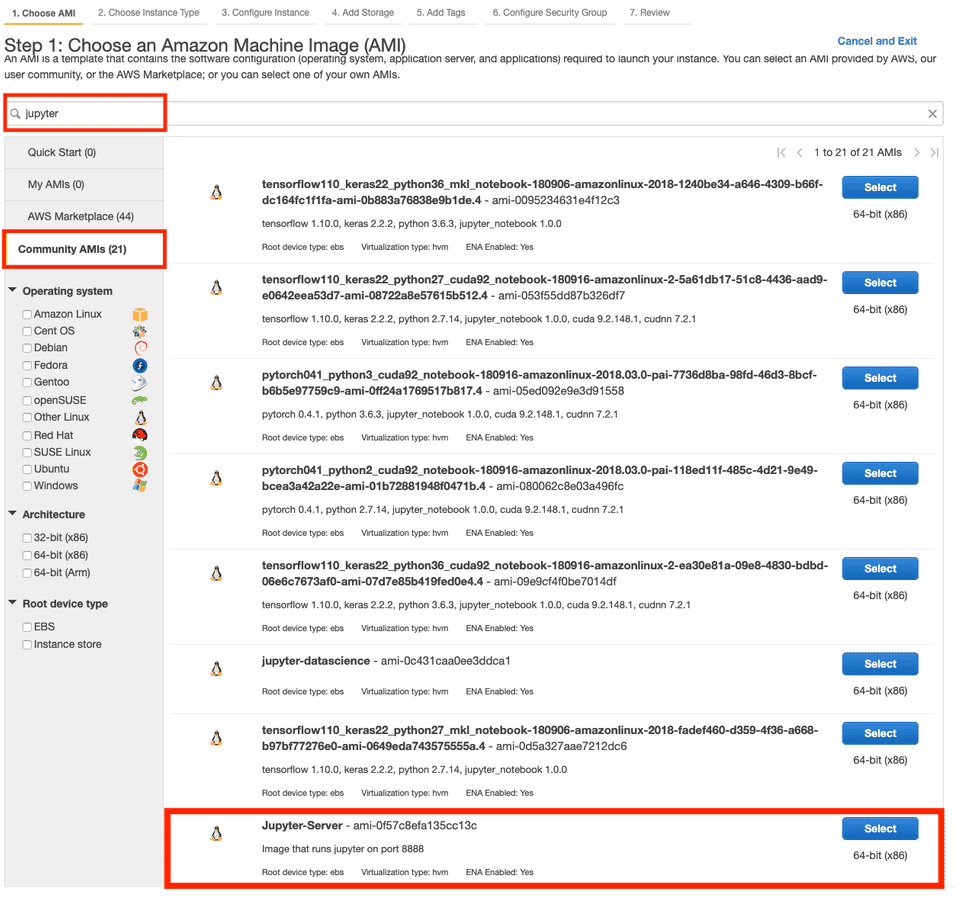
Well, you remember those 12 (mostly easy) steps ? I went through all of them. I have configured jupyter on EC2 even further (for exemple by creating a systemd service so that jupyter automatically starts on boot). And then from that configured EC2 instance I created an AMI, which I called Jupyter-Server. Meaning that every time I need to launch a new instance, I can just launch it using that AMI, and that’s it. Jupyter will automatically be available on port 8888.
Oh, and I also made that AMI publically available. Meaning that you can also launch an instance using that AMI. You just need to search it within the “Community AMIs”:
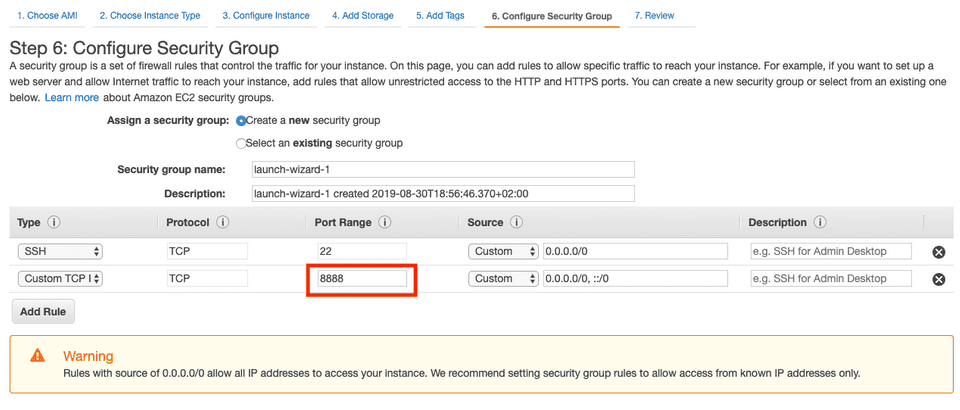
Once you have selected this AMI, you just need to allow port 8888:
And jupyter will be available at http://<public-dns>:8888 a few minutes after you clicked the launch button.
Isn’t it great ?
Disclaimer & Conclusion
This post illustrates how you can “save” an EC2 instance’s configuration into an AMI in order to re-use it later.
Nevertheless, if you don’t know me personally and trust me, you should probably not use this public AMI. Indeed, I could have hidden anything in it (for example a bitcoin miner).
Also, the jupyter security configuration of this AMI is quite poor, as the password is set to “pwd”.
Instead, I encourage you to fully configure jupyter on an EC2 instance once (by following the 12 steps or any other similar tutorial), and then create your own AMI from that instance.
This will save you a lot of time.
And of course, you could also consider using a managed service like Amazon SageMaker.


